
Introduction
Welcome to our comprehensive knowledge base article on performing an auto cycle for Thermon TCM2, TC101, and TC202 controllers. As crucial components in industrial heat tracing systems, these controllers play a pivotal role in ensuring optimal performance and efficiency. Understanding how to execute an auto cycle is essential for maintaining peak functionality and addressing any potential issues that may arise.
In this article, we'll provide step-by-step instructions and expert insights to guide you through the process of performing an auto cycle for Thermon TCM2, TC101, and TC202 controllers. Whether you're a seasoned technician seeking to streamline your maintenance procedures or a newcomer looking to expand your knowledge, this guide is your go-to resource for mastering this essential task.
Resources:
TCM2 Installation, Start-Up, Operating and Maintenance Guide
Legend:
Auto Cycle Step-by-Step for TCM2
Auto Cycle Step-by-Step for TC101, 201, & 202
Auto Cycle Step-by-Step for TCM2
Auto cycling on Thermon TCM2 Heat Trace Controllers is a straightforward process that involves adjusting the controller's settings to automate the heat tracing system. Here's a step-by-step guide:
1. Enter Program Mode:
To enter program mode Simply press the Gear Button on the TCM2
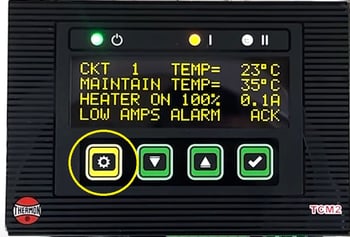
The Display now reads as shown :
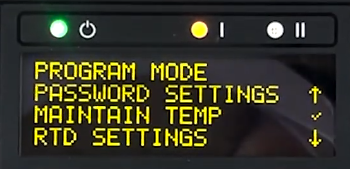
2. Cycling & Entering Configuration
Use the Arrow keys to scroll through the menu options until you reach CONFIGURAION, then press the green ENTER(Checkmark) button to enter the Configuration menu.

The Display now reads as shown :
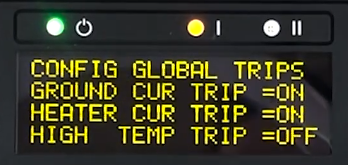
3. Changing Auto Cycle Setting
Within the Configuration setting use the green ENTER(Checkmark) button to cycle trough the options until you reach AUTO Self Test then use the arrow keys to change the value to the desired outcome.

The Display now reads as shown(If set to 24hrs) :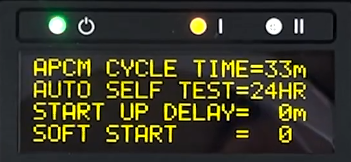
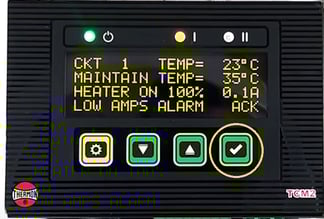
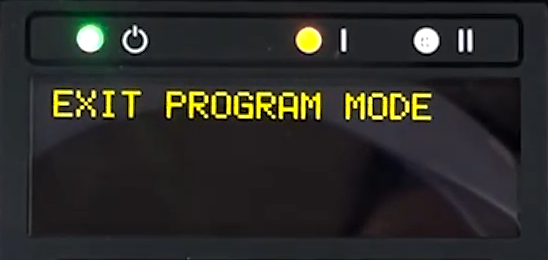
4.Returing to Home Screen
To save your config and return to the home screen press the gear icon several times until you see the display read, EXIT PROGRAM MODE, as shown below. Now press the green ENTER(checkmark) button one last time to return tot he home screen.
By following these steps, you can effectively set up auto cycling on Thermon TCM2 Heat Trace Controllers.
Auto Cycle Step-by-Step for TC101, 201, & 202
Here's a step-by-step guide for auto cycling on TC101, 201, & 202 heat trace controllers:
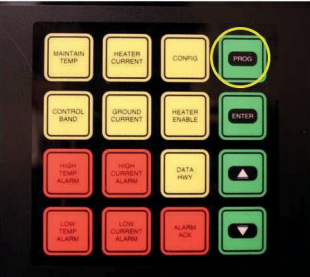
1. Enter Program Mode:
To program circuit control settings or control parameters, multiple keys in sequence
will need to be pressed. To change the settings associated with
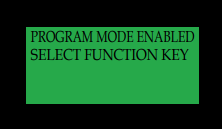
Auto Cycle, first press the green PROG key.
The Display now reads as shown :
2. Entering Config:
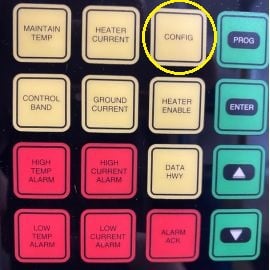
To enter Configuration mode first press the yellow CONFIG key
3. Navigating to AUTO Self Test
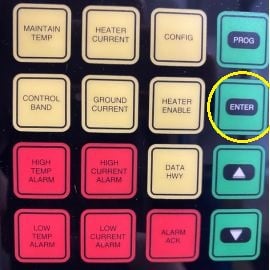
Now that you are in Config press ENTER to cycle through all the sections until you reach AUTO SELF TEST, This should be 5-6 sections down.
The Display now reads as shown :
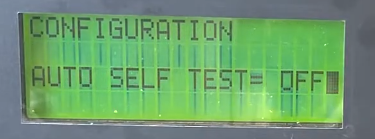
4. Select AUTO Cycle Duration
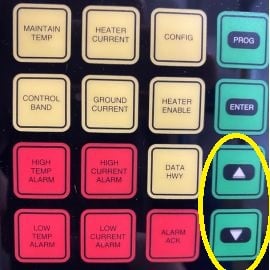
Use the arrows keys to increase/decrease the Auto Cycle time to desired value.
5. Saving and Returning to Home Screen
Press ENTER to return to scan mode and save your auto cycle selection.
Following these steps will enable you to effectively set up auto cycling on Thermon TCM18 and TC1818 Heat Trace Controllers.