
Purpose:
The purpose of this article is to outline the steps to connect and possibly reestablish the connection of the Oleum wireless RTDs to the Genesis controller. This process can be utilized
Thermon currently uses the following third-party products for wireless RTD’s:
- Oleum – DH3 Gateway
- This device will be located at the heat trace control panel and will be the master gateway for any wireless RTD connected to it.
- Oleum – GP-TR81 – Wireless Transmitter
Dh3 Gateway - 10.0.0.10
Steps:
- Open GP Network Configurator software and exit out of the initial popup screen
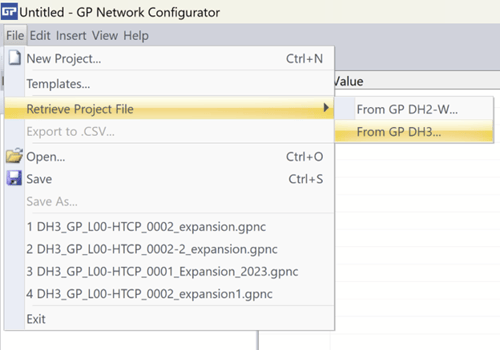
- Go to File and click “Retrieve Project File” and select “GP DH3”
- Connect the PC to the DH3 using an Ethernet cable.
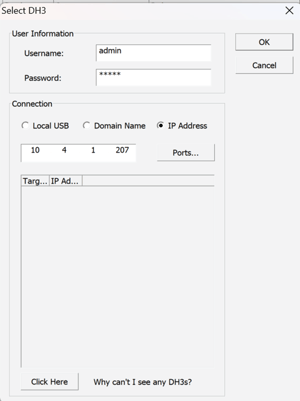
- Enter in the username and password (admin, admin)
- Select Connection type IP
- Enter in the IP address of the DH3 Device
- Click OK
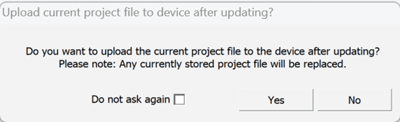
- Once connected you will need to save the downloaded configuration file from the DH3. Click Yes.
- Here you will be able to select and configure both the Gateway and the Wireless RTD listed in the project file.
Configuration of the Device
At this point you may want to review and make configuration changes to both the gateway or the transmitters.
Any change you make will require you to upload the new configuration file to the DH3 Gateway and updating the configuration to the wireless transmitters.
See the following article that outlines how to configure both the gateway and the transmitters - Adding an Oleum Wireless RTD to the Genesis Controller - From Scratch
Connecting and Configuring the Wireless Transmitters
In some cases, you may need to connect to the wireless transmitters to reestablish a connection or to push configurations to the transmitter.
This is useful to reestablish a connection or to replace a wireless transmitter
To do so you will require the Oleum configuration USB cable.
When connecting to the transmitters ensure you are physically connected to the correct one. There is no identification in the configuration file to note which RTD is which. When completed, ensure you label the physical RTD.
Steps:
- Uploading to the Transmitter
- Supply power to the transmitter.
- Connect the PC to the transmitter using the Oleum configuration cable
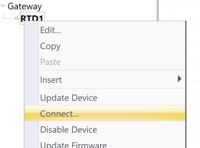
- Right-click on the Transmitter and select “Connect”
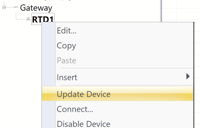
- Right-click on the Transmitter and select “Update Device”
- If the transmitter was used with another project file, the Site Security Mismatch window will appear. Click Yes to proceed
- Upload the new DH3 Configuration file to the DH3 Device - via the Ethernet connection.
- Connect the PC to the DH3 using an Ethernet cable.
Note: Ensure your computer IP address is set to static and in the same Subnet (IP address similar but not matching to the DH3 Device)
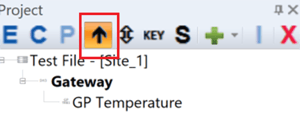
- Select the Gateway and Select Update Arrow
- Enter in the username and password (admin, admin)
- Select Connection type IP
- Enter in the IP address of the DH3 Device
- Click OK

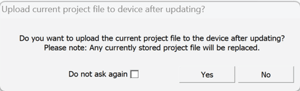
- Once uploaded the DH3 will ask if you want to upload the configuration file to the DH3. Click YES
- Connect the PC to the DH3 using an Ethernet cable.