
Background:
In ATCOM+, heat trace circuits are organized in a hierarchical structure comprising of:
- Panels (Tag only)
- Controllers
- Individual circuits
The highest level in this hierarchy is the "Panel," which serves as a tag for grouping related controllers. Within each panel, users can add "Controllers," representing the physical heat trace controllers present in the field. Each controller can then house multiple "Circuits," representing the individual heat trace circuits controlled by the respective controller. Where a single controller (example: nVent 920) is located inside a panel. Or where multiple controllers (example: 2 or more nVent 920's or multiple Thermon TCM18s) are located inside a single panel.
The next in the Hierarchy is "Heat Trace Circuits" these are the individual circuits in the controller. (Example, nVent 920 = 2 circuits, Thermon TC1818A = 18 circuits)
Adding a Controller:
-
Create a Panel:
-
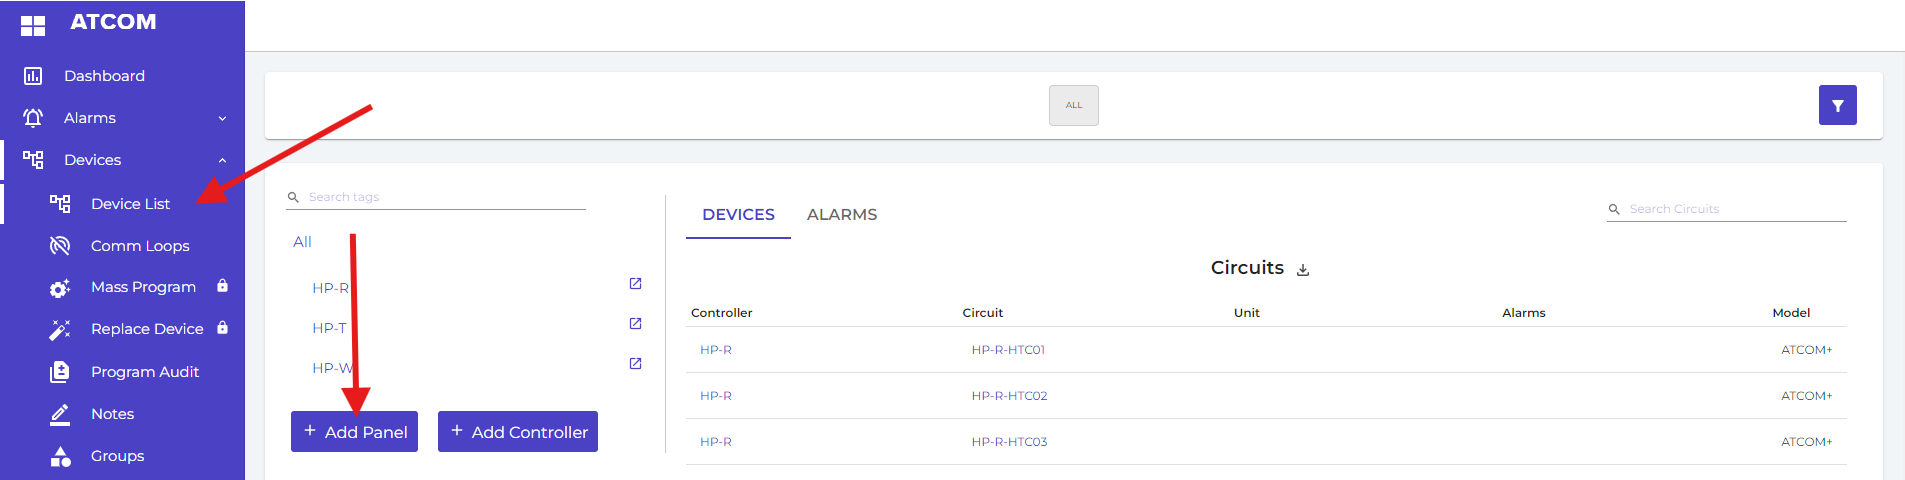
Navigate to the "Device List" section in ATCOM+.
-
If a panel hasn't been created yet, click on "+ Add Panel" at the bottom of the screen.
-
Enter the desired panel tag and click "Save" to create the panel. It will be listed in the tree view.
-
-
Add a Controller:
-
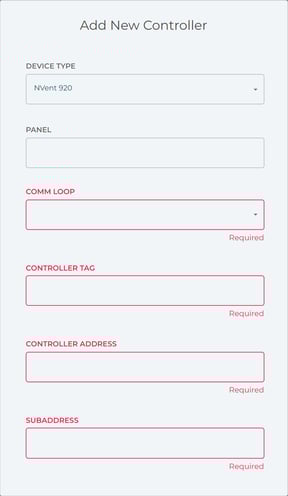
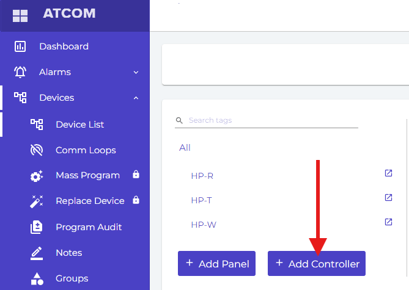
Click on "+ Add Controller."
-
Select the device type from the dropdown menu.
-
Choose the appropriate panel from the dropdown list in the "Panel" field.
-
Specify the communication loop to which the controller is connected.
-
Select the assigned supervisor client from the dropdown menu.
-
Enter the IP address, port, controller tag, and controller address (typically the modbus address)
-
Behind the Scenes:
Upon adding a new controller to ATCOM+, the software automatically initiates the download of all device configurations associated with that controller.
3. Adding Controller and Circuit Details:
After adding a controller, users can proceed to the heat trace circuit pages to complete the desired circuit programming. Additionally, they should input all necessary information regarding the circuit, including EHT information, process details, and design values.
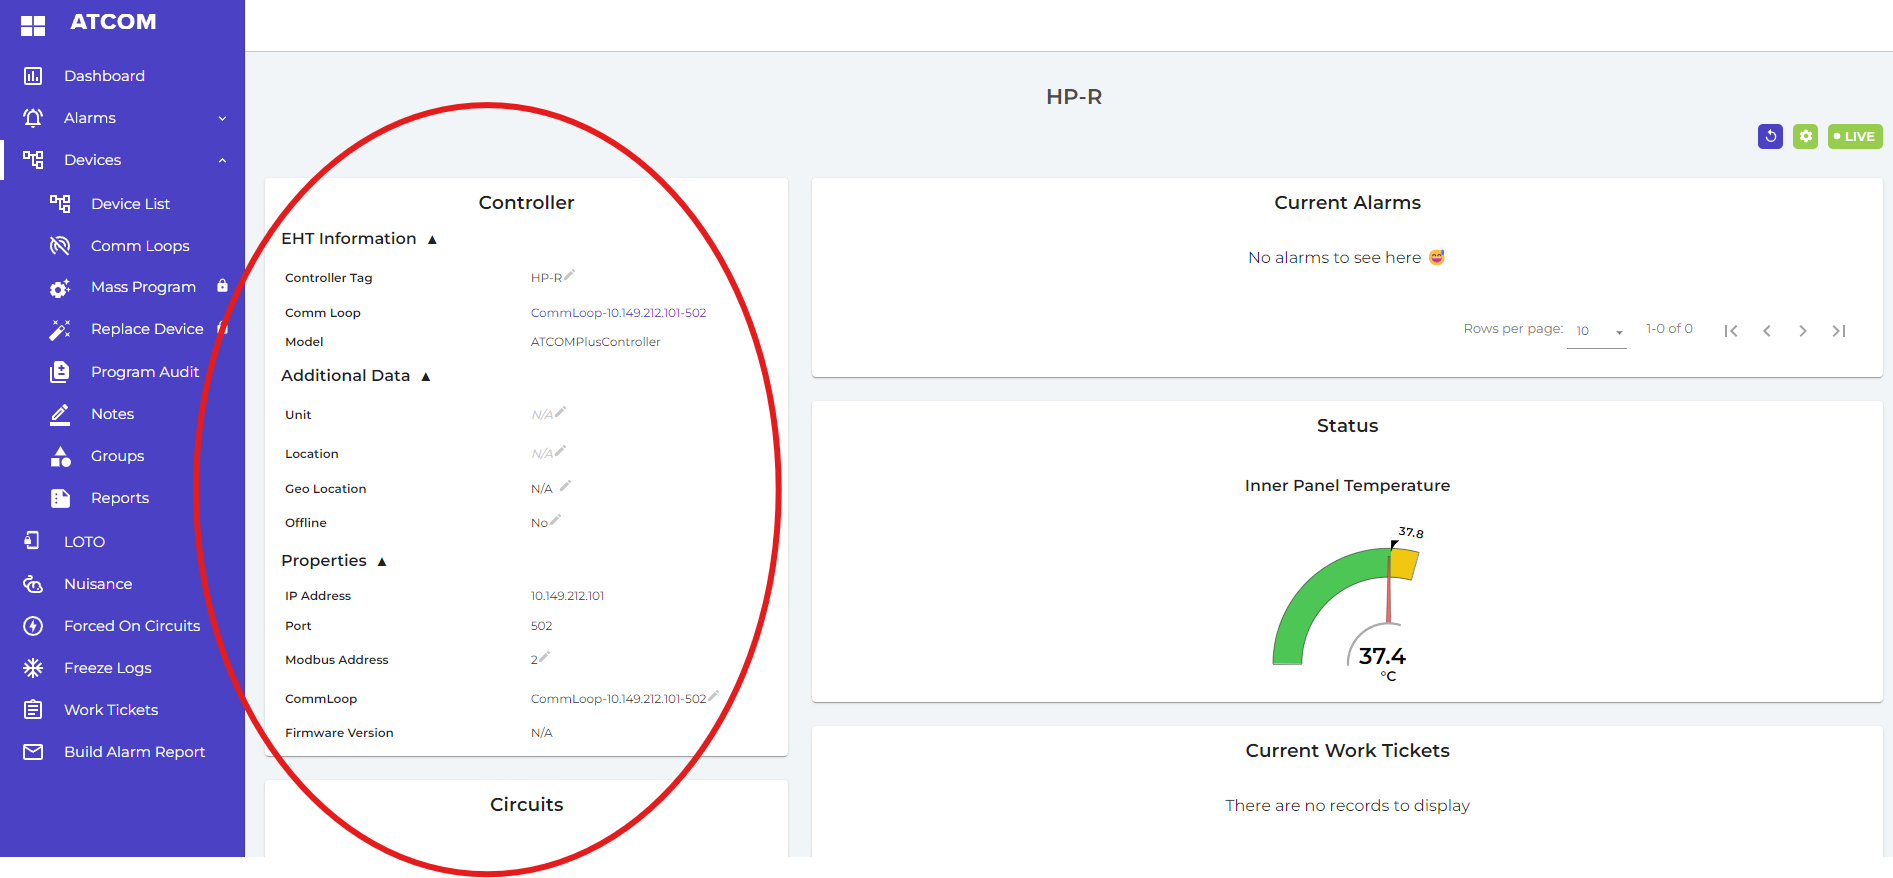
Note: Initial design values will be populated based on the initial controller import and must be verified against the design documentation for accuracy.
Congratulations on successfully integrating your first Heat Trace Controller into ATCOM+! By following this step-by-step guide, you've not only enhanced the functionality of your system but also opened doors to further customization and optimization. With the foundation laid down, you're now poised to scale your operations seamlessly.
Explore advanced features, experiment with diverse configurations, and leverage real-time data insights to drive continuous improvement. By harnessing the full potential of ATCOM+, you're not just optimizing heat management—you're unlocking new dimensions of productivity, sustainability, and performance.
Embrace the power of ATCOM+ and embark on a path of unparalleled control, flexibility, and efficiency. Your journey has just begun, and the possibilities are limitless. Welcome to a future where every trace of heat is managed with precision, intelligence, and ease.